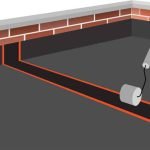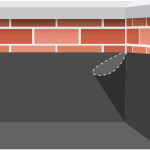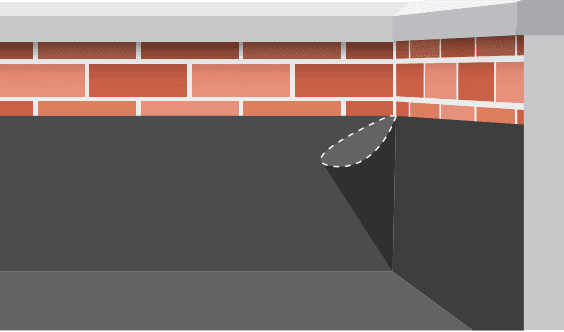
INTERNAL CORNER DETAIL
Training hub – all your questions answered!
For the best results, please follow the instructions below.
If you still have questions please feel free to contact us using the form here…
STEP 1
Form the membrane into a 45 degree (pig’s ear) shape where the membrane meets in the internal corner.


STEP 2
Cut the pig’s ear vertically 80 mm out from the flat roof corner.
STEP 3
Cut a patch of 229 mm flashing tape 160 mm wide and offer over the pig’s ear and mark around with a scribe or pencil.

STEP 4
Firstly check primer is fully tacked off. Fold the pig’s ear back and push into the corner, then using a scrubbing pad apply a coat of primer to the other side of the pig’s ear.
STEP 5
Firstly check primer is fully tacked off. Fold the pig’s ear back and push into the corner, then using a scrubbing pad apply a coat of primer to the other side of the pig’s ear.


STEP 6
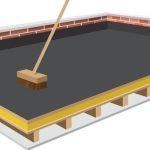
Carefully position the tape in the corner and fix from the bottom working up to prevent air bubbles forming behind the tape.
STEP 7
Once the tape is fixed in place, pressure must be applied with a seam roller to ensure correct adhesion. Please note that all FlexiProof tapes are pressure-sensitive and always require rolling.