A brief introduction to rubber roofing
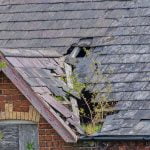
Apart from DIY enthusiasts, one of the worst projects for any homeowner is how to approach flat roof repairs. Poorly installed roofing, worn felt, or damage can cause a range of serious problems in the home, including structural damage. Felt is the material of choice for many flat roofs but can deteriorate and have a limited lifespan. Rubber roofing lasts much longer, is easy to install and won’t disintegrate, tear or suffer from changes in temperature or extremes in weather.
The most popular rubber roofing system is EPDM. This synthetic rubber membrane is produced from oil and gas and is the most frequently used material when installing rubber roofing systems. It is favoured by many due to its durability, flexibility, ease of installation and excellent track record.
Installed using a quick seam technology, the membrane enables faster installation, improved performance and faster installation. The manufacturers listened to roofing specialists and were able to identify problematic areas of the roof, such as edges, seams, and corners. They also developed a roofing material that would expertly address all of these troublesome roofing areas.
EPDM is available in various widths and is often purchased to suit the roof area. It is bonded to the roof surface underneath using a superior-strength adhesive.
You may be wondering what’s so great about a rubber roof, but in this guide, we will talk you through, step by step, what a rubber roof is along with the key benefits before exploring the EPDM system in more detail, including top installation tips.
Contents List
Chapter 1 – How to make your flat roof last for years with a rubber roofing system
Chapter 2 – Make the most of your flat roof space with a rubber roofing system
Chapter 3 – How the EPDM system is used for optimum flat roof coverage
Chapter 4 – Make the most from your flat roof with top rubber roof installation tips
Chapter 5 – Keep your rubber roofing materials in tip-top condition
Chapter 6 – Rubber Roofing Installation Step by Step
Chapter 7 – How to choose the right deck material for your roof
Chapter 8 – Expertly install a rubber roof membrane
Chapter 9 – It’s all in the detail. Rubber roof finishing touches
Chapter 1
How to make your flat roof last for years with a rubber roofing system
In recent years, both roofs and technology have evolved considerably, and roofing specialists are looking toward innovative roof coverings which offer greater protection and less maintenance than traditional roofing materials. EPDM Rubber is one of the most popular materials used for flat roofs as it provides strength, resilience and little to no maintenance.
Currently, rubber is used on many flat roof installation projects, and many people don’t even realise the roof above them is made of rubber!
There are many reasons why rubber is now a preferred material, from its strength and ease of installation to its energy efficiency and low environmental impact. Rubber used in modern systems is fully recyclable
Chapter 2
Make the most of your flat roof space with a rubber roofing system
Flat roofs are notorious for wear and tear and prone to weather damage, peeling and much more. A rubber roofing system is an ideal choice if you are looking for an effective alternative. What’s more, there are so many benefits to rubber over the traditional felt style.
Kind on the Environment
Modern rubber roofs are manufactured from Ethylene Propylene Diene Monomer and it is suitable for an array of adverse conditions which often occur with flat roofs. With eco-friendly materials and relative ease of installation, many roofers recommend our system due to its reliability and value.
Long Lasting
Rubber membranes are perfect for use in extreme conditions, and many leading brands rely on them for their factories, including Staples, Microsoft, Honda and many more. They are also used in commercial buildings and in hospital, school and station construction projects. With a lifespan of 50 years the product requires no maintenance and is water and weatherproof.
Resilient
Rubber roofing systems do not deteriorate with age, neither are they prone to cracking or peeling which are commonplace on regular felt roofing materials. Furthermore they are waterproof, repelling moisture which makes them perfect for a flat roof. In addition, the material is breathable, allowing any vapour to escape, which prevents any blistering. The material is also able to withstand UV and infrared light.
Appearance
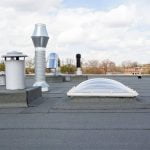
These systems are Dark slate grey in colour so the flat roof surface looks as natural as possible and it doesn’t show dirt. Once the membrane has been installed it doesn’t need covering with stone chips so it keeps your gutters and downpipes free from debris too.
Key Advantages of rubber
- It is flexible throughout its lifespan and has an expected lifespan of 50 years
- Resistant to both UV and infrared light without the requirement for additional protection
- Waterproof so it can withstand heavy rain, chemicals from the environment or industrial pollutants
- Resistant to cold, heat and natural ageing
- The material produces zero toxic emissions so the water from your roof can be collected and reused for watering plants or the garden
- The material is very elastic and doesn’t shrink with changes in temperature
- Extremely environmentally friendly and energy efficient
Chapter 3
How the EPDM system is used for optimum flat roof coverage
The revolutionary system provides any homeowner, builder or roofing specialist with a practical and functional rubber roofing material which is waterproof and ideal for flat roofing projects. In many projects, the roof is measured to size before the correct membrane is ordered and fabricated to fit the size of the roof to reduce the prevalence of seams. The installation process is relatively straightforward and there is no need for hazardous materials, heating torches or other tools traditionally used in the felt roofing application process.
The rubber membrane is a group of synthetic rubbers from the EPDM polymer. Although there are a number of ways to create the rubber from the polymer, all rubbers contain a complex chemical structure which provides protection against heat, sunlight, air pollution and cold which make it an ideal choice for use on roofing projects. Furthermore, the membrane will remain flexible and will never turn brittle or crack, neither will it dry out in extreme heat and can withstand water permanently still on its surface.
EPDM roofing is popular only if you purchase it from a reputable supplier.
Some of the lower-cost versions may shrink with age, creating additional stress at the edge, leading to tears, which significantly reduces their lifespan. As sheet sizes are limited, large roofing projects may contain a number of seams, so it is important that you commission a qualified rubber roofing installer to ensure that the seams are bonded correctly.

Chapter 4
Make the most from your flat roof with top rubber roof installation tips
Installing a rubber roof is a skill, but once mastered, it is a relatively straightforward process. What’s more, it doesn’t require any specialist tools or equipment and with the following top tips there is no reason why your new rubber roofing system won’t last for many years to come.
Surface Preparation
Ensure that all debris, stones or dirt are removed from the roof deck
Mind the Gap
Before installing the rubber membrane, look at the surface of the roof underneath and ensure no gaps. The gaps shouldn’t be more than 6mm across. Larger gaps will become visible through the membrane.
The Weather
Choosing a fine day to install the roof can be problematic, particularly with the unpredictable British weather. But if you can, try and schedule your roofing installation in when you know the weather is going to be clear. The outstanding feature of our material is if you do get caught short with poor weather, simply sheet the roof over and when the weather clears, dry any Damp areas With construction tissue and gently warm the area with a hair dryer or heat gun and resume work once dry.
Maintenance
Although the roof requires no maintenance, it is always good practice to check its surface where practicable each year. Clear the roof of debris, such as leaves or branches, to allow for the clear passage of water.
EPDM rubber has other positive characteristics, like the fact that it does not pollute run-off water. This is a great way to recycle the water and use it for such purposes as watering the garden. EPDM rubber roofing is fast becoming popular with “green” and eco-friendly projects, not only because of the water conservation aspect, but also because it is one of the environmentally friendly and sustainable materials using in construction today. Those looking to create a rooftop garden can install rubber roofing and place the foliage on top of it.
Chapter 5
Keep your rubber roofing materials in tip-top condition
The materials you use, such as adhesives, flashing, tapes and the actual membrane, are the most important elements of a rubber roofing system. Poor materials caused by incorrect storage can fail and lots of repairs.
- Please consult the instructions carefully on adhesives, sealants and primers and ensure that they are stored safely away from heat or flames
- Maintain optimum levels of ventilation in areas where the products are stored
- Containers should be kept tightly sealed during storage
- Adhesives should be stirred thoroughly before use, storing at room temperature
- During spells of particularly dry or hot weather, ensure that adhesive containers are adequately protected to prevent them from drying out
Specialists in rubber roofing materials
DIY Doctor
Chapter 6
Rubber Roofing Installation Step-by-Step
A skilled installer of rubber roofing will firstly collect accurate dimensions for your roof so that they can obtain a single sheet of rubber to apply to the roof.
OSB 3 is the preferred choice of many roofers as the roof deck. It is engineered to last and is specifically built for the construction sector. It is moisture resistant and load-bearing. It also provides the equal suction required to assist drying of the water-based decking Adhesive.
Plywood is the alternative but make sure it is WBP Board. Before you use the plywood, ensure that it is free from any knot holes, splinters or bumps. This will not only make the surface uneven but it can cause punctures to the roofing membrane.
Top resources to find the right rubber roofing tools;
https://www.doityourself.com/stry/rubber-roof-installation-tools Do it Yourself
https://pro.homeadvisor.com/article.show.Low-Slope-Reroof-with-EPDM.13858.html Home Advisor
Chapter 7
How to choose the right deck material for your roof
When installing a rubber roof, on more occasions than not you will have to replace the ‘deck’ with new wood. You can replace the existing wood or apply an overboard before installing the rubber membrane.
It is always preferred to provide a new deck surface, but in some situations where this just isn’t cost-effective Over-Boarding can be carried out, but only if the surface of the roof is in good condition and it is not constructed of chipboard. Ceilings underneath will be safeguarded as you are not levering off timbers from above.
Stripping the roof – This is the most common method of preparing the subsurface and is ideal for use when the roof has been constructed with chipboard.
Chapter 8
Expertly install a rubber roof membrane
Once the original roof surface has been overboarded or stripped, ensure that the surface is completely clean and free from debris or particles as gravel or debris can prevent the membrane from bonding to the surface.
It is always advised, after removing the membrane from its packaging to let the rubber ‘relax’ for up to half an hour so that it can contract and change back to its natural state.
Once the membrane is ready to install it needs to be glued to the surface underneath. Usually a water based adhesive is evenly applied to the deck using a roller, ensuring that no bumps or debris is left on the surface as this will create bumps in the roof once the membrane is applied. Rolling the membrane from the middle outwards to avoid creases, brush the rubber membrane into the glue with a soft brush, with a little pressure but not too much. You don’t want to stretch the rubber.
Once the roofing membrane is glued to the area of the roof, the water-based adhesive will dry slowly, so avoid pulling any heavy items across the surface as this may cause the roof membrane to stretch.
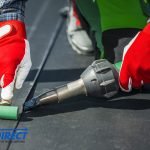
Detailing is an important element of rubber roof installation. You will now need to use what is known as a contact adhesive around roof details such as outlets, pipes and edges. This adhesive is much stronger than the water-based adhesive and will allow you to bond the membrane to problem areas such as corners and other small areas. Apply the contact adhesive to both surfaces and bond the membrane with the surface using a roller.
Once the main roof has been installed you are now ready to start work on the finer details of the roof.
Chapter 9
It’s all in the detail. Rubber roof finishing touches
The detailing aspect of the roof is perhaps one of the areas where many people go wrong . Find the right trims for the roof such as edge trims.
Kerb Edge – These are plastic trims which are placed at the top of the membrane or sheet to form a watertight barrier. They also ensure the water is kept on the roof and directed toward the drip trim.
Metal Edge – These can be used depending on the fixing style and whether they can be seen from above. If the roof can be viewed from a window in the home, then an alternative trim may be recommended.
Plastic Edge – Available in black or white and they are available for corners, joints and other areas which require detailing on the roof.
The last stage in the fitting process is to install flashings where the roof meets brickwork. Usually, this is completed with a wall trim.


